 |
|||
|
Page Title:
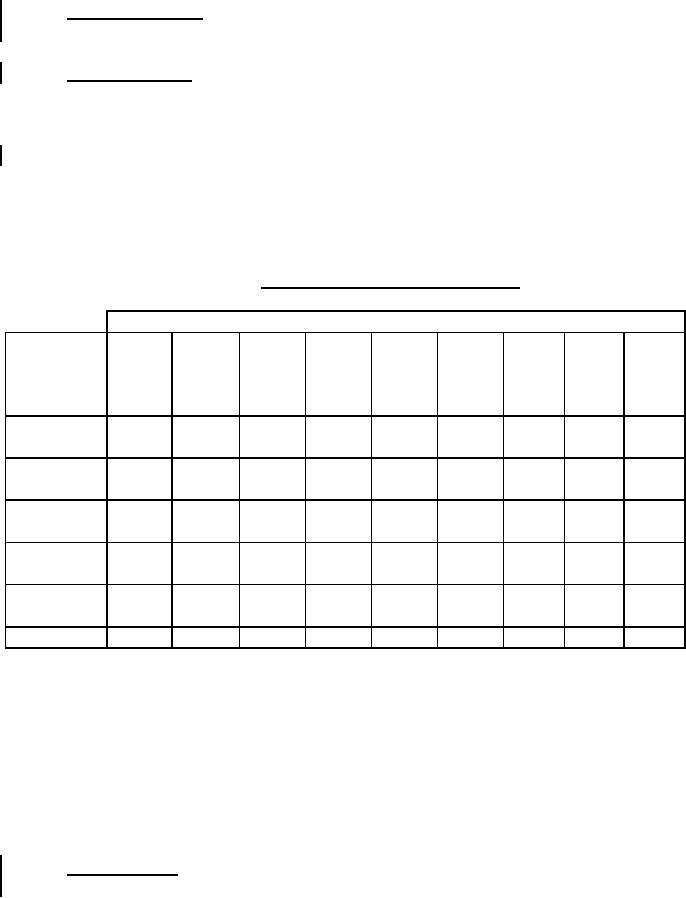
Table IV. Permissible variations from flatness. |
|
||
| ||||||||||
|
|  MIL-A-46100D (MR)
w/INT. AMENDMENT 2
within 6 inches of each other and which do not violate the minimum allowable thickness, as
specified in the applicable drawings and fabrication documents, are acceptable.
3.2.9.2 Internal soundness. All plates 1/2-inch and greater in thickness shall be
ultrasonically examined for internal soundness in accordance with 4.6.6.
3.2.9.3 Edge preparation. Thermal cutting shall be permitted after final heat treatment
provided the procedure, which shall include grinding after thermal cutting, is such that no
cracks develop on any thermally cut edge whether detected by nondestructive inspection, or
as agreed upon in the contract. To reduce the potential for plate cracking, plates shall not be
cut by cold shearing after final heat treatment, unless otherwise specified. The heat affected
zone of thermally cut plates (up to and including 1/2-inch in thickness) shall not exceed 1.2
times the plates thickness from the cut edge. For plates over 1/2-inch thick, the heat
affected zone shall not exceed 5/8-inch from the cut edge. In order to have the heat affected
zone exceed these limits approval shall be obtained from the procuring activity.
TABLE IV. Permissible variations from flatness.
Variations from a flat surface for specified widths, inches
Over
36 to
48 to
60 to
72 to
84 to
96 to
108
120
Specified
8 to
48
60
72
84
96
108
to
to
Thickness,
36
excl.
excl.
excl.
excl.
excl.
excl.
120
144
inches
excl.
excl.
incl.
Up to 1/4,
13/16
1-1/8
1-3/8
1-7/8
2
2-1/4
2-3/8 2-5/8
2-3/4
excl.
1/4 to 3/8,
3/4
15/16 1-1/8
1-3/8
1-3/4
1-7/8
2
2-1/4 2-3/8
excl.
3/8 to 1/2,
3/4
7/8
15/16 15/16 1-1/8
1-5/16 1-1/2 1-5/8 1-7/8
excl.
1/2 to 3/4,
5/8
3/4
13/16 7/8
1
1-1/8
1-1/4 1-3/8 1-
excl.
5/23
3/4 to 1,
5/8
3/4
7/8
7/8
15/16 1
1-1/8 1-
1-1/2
excl.
5/16
1 to 2, incl. 9/16
5/8
3/4
13/16 7/8
15/16 1
1
1
Note 1: Flatness tolerances for length - The longer dimension specified in considered the
length, and variations from a flat surface along the length shall not exceed the tabular
amount for the specified width in plates up to 12 feet in length, or in any 12 foot or longer
plates.
Note 2: Flatness tolerances for width - The flatness variations across the width shall not
exceed the tabular amount for the specified width.
Note 3: When the longer dimension is under 36 inches, the variation shall not exceed 3/8
inch. When the larger dimension is from 36 to 72 inches, incl., the variation shall not
exceed 75% of the tabular amount for the specified width.
3.2.9.4 Edge condition. Plate edge on plates delivered after heat treatment shall be free of
cracks. The supplier shall practice such necessary process controls to prevent this condition.
8
|
|
Privacy Statement - Press Release - Copyright Information. - Contact Us |